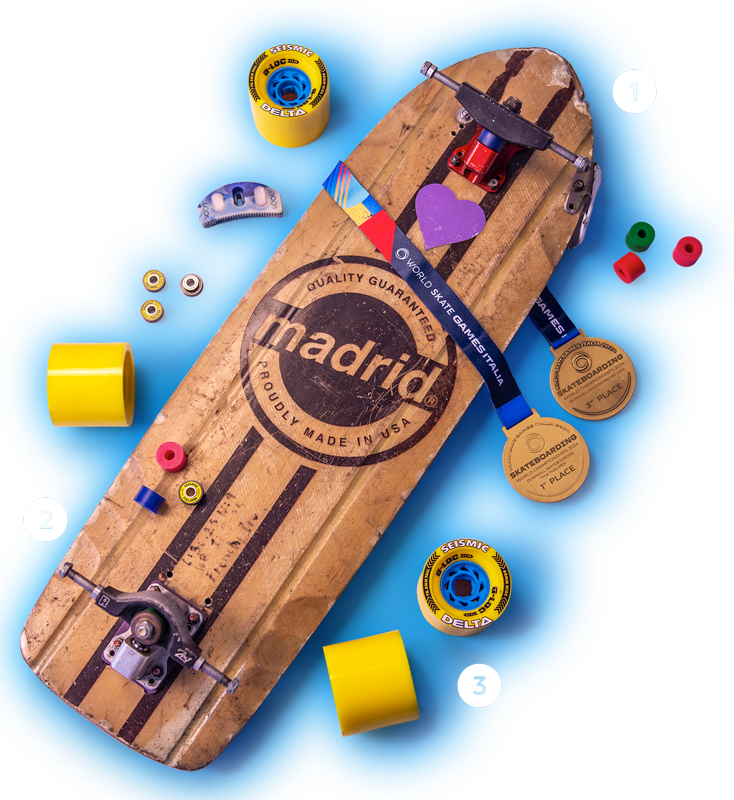
I receive quite a few questions regarding the gear I ride. I’ve put together a list of every component I’ve chosen to trust. While I strive to ride the most effective gear, I believe skateboarding is extremely subjective. With this said the gear I choose to ride is the best for my riding style. I hope you enjoy the read and learn something applicable to your own experience.

A little video of me ranting about the gear I ride.

Madrid Truth 2026 prototype:

This version of the truth is significantly narrower under the front foot. I’ve been playing around with finding the balance between railmatching and trying to squeeze a bit more leverage out of my front rails. My deck is always a work in progress, and therefore always a prototype. The construction remains Madrid’s Signature M-Core formica and maple layup. 

The current dimensions of my board are as follows: 31″ Long; 9″ Wide (no taper); 18.5″ baseplate to baseplate (21″ axle to axle).

More info: See Product

Seismic Alphas:

I have been exclusively riding Seismic Alphas for at least 4 years now. Through racing against the extremely competitive Magnums, I have learned to rely on the advantages Seismic Alphas have. These wheels have extraordinary straight line speed and are extremely controllable, especially relative to other fresh wheels. Especially for lighter riders, these wheels can serve as the perfect wheel for getting into racing.

Off the race track, once broken in all versions of the Seismic Alphas are my favorite fast freeride wheel. The urethane has a great edge feel and mid slide characteristics. 

When debating between the 75.5mm and 80.5mm Alphas, there are a couple of factors to consider. What is the main purpose for your wheels? If it is purely competitive, I tend to lean towards the 75.5mm Alpha as it will accelerate faster out of corners and I find that it has a bit more redirection in low degree slides. If you want to do more fast downhill and some freeride then I would suggest the 80.5mm Alpha. The 80.5mm model has a slightly smaller contact patch and stiffer lips making it more geared towards fast freeride. There is also that much more urethane to burn through. I have been watching Aaron Hampshire and Dan Gesmer work on a new product that will bring the wheel options full circle. I can’t wait to try them out on track.

More info: See Product

Rogue ZM1 Slalom Trucks:

Front: 78a Cone Roadside  78a Short Barrel Boardside

Back: 93a Short Barrel Roadside  97a Short Barrel Boardside

( ⅛” Riser under rear truck)

I believe trucks are the most impactful piece of gear you can have. For the past few years I have been riding ZM1 Slalom trucks from Rogue. I transitioned on to these from the 2020 Rogue DH trucks. My skating career has gone through multiple truck phases, but for my current style and intentions ZM1s are the best fit. 

For racing, ZM1s are in my opinion one of two top options. Zak Maytum, Justin Rolo and the rest of the Rogue team have put some serious knowledge and miles into designing these trucks. With the 55° front truck you can maximize the turn of your front two wheels, while the 20° rear truck keeps you stable and smooth, increasing grip. (I am currently playing around with a 23° rear baseplate to see if that increases some grip and rotation. Note, I notice a bit too much oversteer on higher speed corners (especially toeside)) The rear riser allows for a more directional geometry, helping place more weight over the front truck. 

For freeriding, I have found surprising ease using these trucks. While some of the most reactive trucks on the market, my board and style have adapted to these trucks. With proper preload, toesides, and squatties come pretty easily, as for stand up heelsides, I have yet to feel comfortable pushing longer ones out. However if you look at skaters like Zak Mills Goodwin, it is definitely possible. 

In my ZM1s, I’ve been riding full Venom Bushings. (I have been testing some of the new Seismic Bushings and believe I will find some situations where I prefer them.) In my front truck, I have a blue 78a cone roadside and 78a short barrel boardside. For the pivot and insert, I have spherical bearings all around. This bushing combo allows for unlimited turn while keeping some resistance for getting back to straight through corner exit. The cone really accentuates this as it gives me zero pushback mid turn, those small wobbles you can get when turning. In my rear truck, I’m running 93a short barrel roadside and 97a barrel boardside. This mix gives me ample stability while still allowing me to lean and rotate the board comfortably. I used to ride a harder mix, though after trying the 93a short barrels instead, I am able to turn the wheels to a point of release a bit quicker. 

More info: See Product

Seismic Lokton 36 Grit:

When it comes to grip I will only settle for Seismic Lokton. The large and sharp stones let you maximize the forces you are able to apply to your board and therefore your wheels. Even when the conditions are wet, there is no loss in the connection between you and the board. While it can be a hassle to apply, this grip never comes off, almost to a fault. Its pressure activated adhesive means you don’t have to heat it, by standing on it you bond it to your board.

More info: See Product

LOCK Footstop:

I am back to riding the LOCK Footstop. The slight overhang hugs your foot as you turn heelside and sometimes the toe wants to lift. I like to sand down the front round edge, it is textured to be a reversible footstop, but I prefer having the front side smooth. I drill a hole about one centimeter from my mounting holes, three quarters the way forward (between the selected mounting options). This allows my front foot to be positioned perfectly over the front truck. For your first attempt, drill three or four different options, inline with each other going forward. With this, you can test how far forward you want your foot. I install the footstop on a venom insert bushing so it clasps the top edge of my shoe, and I make sure not to fully tighten the hardware so the footstop can swivel with my foot. With all these particular mounting details I think it is the perfect footstop. 

 Another notable mention is the Riptide Ambroise Slab Footstop. It comes with a variety of raised washers to tune the perfect height for your shoe. (I have used it for the past year and believe it is a great option).

Sidenote: I am also testing a front toe bracket mounted to the front of the board. While riding I do not interact with it, it comes into play when my foot slips forward. The toe stop prevents my foot from slipping forward and losing heelside leverage. 

UlrichBecker FootBreak Soles:

Foot Brake soles have become an industry standard with racing and fast freeriding. Footbreak soles enhance your connection with the grip tape and allow you to throw out slides with more confidence. Different options have emerged on the market. I’ve chosen these specific foot brake soles. They have no pattern and therefore full contact between shoe and board. The material used is extremely grippy and given the wear is applied to the entire surface, the foot brake sole lasts longer than most. I have also tested them in wet conditions and found no difference between these and other footbrake soles with patterns on the underside.

Note: For shoes I wear the Adidas Tyshawns, and I have been for the past couple of years. I have found that they are the perfect shoes for my riding style.

More info: See Product

Venom Torque Block:

Another piece of kit that has become a staple on almost every fast freeride/race setup is a torque block. Almost a hack for all things fast. A torque block will help apply more force to the rear wheels making high speed slides a bit more comfortable. I have also found I can save a lot of energy while tucking.

I do a couple of things that seem to surprise most people. Before mounting my torque block, I wrap it in duck tape and I use velcro to secure it to my board. The duct tape does two things. First, it will extend the life of the foam by quite a bit. I have been using the same torque block for three years now and only recently set up a freshie. Secondly, wrapping the torque block in tape stiffens it up allowing force to be more directly applied to the wheels. (Maybe soon I will look into making a torque block out of a harder material.) The velcro is especially useful when first trying a torque block. Using velcro allows you to adjust the distance and angle of your block as you are getting used to it. As I am often testing new decks, I keep my torque block on velcro so I can switch it between boards. I will make a separate post/video about the whole process.

More info: See Product

Similar Posts